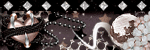
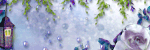
Blinkies


Email Me
ladyaries_67@yahoo.com


Creative Teams
♥Proud Personal CT♥

Forums


I Support...

Thursday, October 31, 2013
Blinkies
I made these a few days ago using an online generator.
Purple is my favorite color so I had to make them purple. lol
I've added a few others I made also, omg I have a folder full of these that I made up.
One of these days I hope to learn to make these in psp.


Monday, October 28, 2013
CT Tag Show Off
Here are my CT tags that I made for Sassi with her fantastic kit
"Franky".
This kit was made to match the beautiful tube "Franky" by Spazz. You can get Sassi's kit Here and you can purchase this tube from Spazzed Art. You must have a license to use this art.


Saturday, October 26, 2013
Spookyness Falls Snags
I liked this tag so well after writing the tut that I decided to share some snags of it.
I made this snag set with artwork of Tony Tzanoukakis which can be purchased from his store HERE. The scrap kit I used is a PTU kit by DevilishDezines, "Come Hither" which can be purchased HERE.
*click on image to view full size & right click to save*
Enjoy ♥ 


Spookyness Falls - PTU

This tutorial is from my own imagination,
any similarity to any other tag or tutorial is purely coincidental.
It was written by LadyAries on October 26th, 2013.
This tut was written for those with a basic knowledge of psp.
*Supplies Needed*
PSP: I am using X2 but any of them should work.
Drop Shadow usually V3 H3 O25 B5 black
This is a PTU tube and you must have a license to use.
*Scrap kit Of Choice*
I am using the fantastic PTU kit "Come Hither" by DevilishDezines.
And it can be purchased HERE.
*PlugIns*
Eye Candy 6, Gradient glow for the name with #7f7f7f
~ ~ ~ ~ ~ ~ ~ ~ ~ ~
~ ~ ~ ~ ~ ~ ~ ~ ~ ~
*Let's Get Started*
*Remember to add your drop shadow as you go along*
Open a new image 650 x 650
Frame1 resize 72 percent, copy & paste to the center of your tag.
Activate the magic wand and click inside the frame. Selections modify expand by 16. Open a new raster layer and flood fill with #7f7f7f. Selections, selections none & drag below your frame.
Resize your tube to your liking, Copy & paste to the right side of your frame.
Element3 resize 68 percent, copy & paste to the center of your tag.
Element22 resize 40 percent, copy & paste to the left side under your frame.
Element37 resize 55 percent, copy & paste to the left side under your frame.
Element45 resize 16 percent, copy & paste to the right side under your frame.
Element18 resize 25 percent, copy & paste to the left side of your frame. Duplicate & pull apart so the two are kinda side by side.
Element18 resize 18 percent, copy & paste to the left side of your frame. Duplicate & mirror then drag back to the left side of your tag. This will give you a nice bunch of mushrooms.
Element32 resize 15 percent, copy & paste to the top center of your frame.
Element16 resize 18 percent, copy & paste to the left side under your frame.
Element34 resize 18 percent, copy & paste to the right side of your tag.
See my tag for details.
Add more elements if you wish to.
Open new raster layer and send to the bottom, copy & paste paper3 and apply your mask.
Open new raster layer and send to the bottom, copy & paste paper3 and apply your mask.
When you are happy with your tag merge all layers and resize to your liking.
Apply the correct artist copyright and license info and save as a PNG, then add your name and merge & save.
Apply the correct artist copyright and license info and save as a PNG, then add your name and merge & save.
I hope you enjoyed this tut. ♥
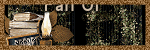
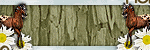
Thursday, October 17, 2013
Autumn Splendor - PTU

*Click tag to see full size*
This tutorial is from my own imagination,
any similarity to any other tag or tutorial is purely coincidental.
It was written by LadyAries on October 17 th, 2013.
This tut was written for those with a basic knowledge of psp.
*Supplies Needed*
PSP: I am using X2 but any of them should work.
Font of choice, I am using AkaDora
Mask: HorsePlay's Pasture Mask9 HERE
Be sure to place your mask into your mask folder.
Drop Shadow usually V3 H3 O25 B5 black
These are PTU tubes and you must have a license to use.
*Scrap kit Of Choice*
I am using the beautiful PTU kit "Autumn Symphony" by Vickie's Scraps.
~ ~ ~ ~ ~ ~ ~ ~ ~ ~
*Let's Get Started*
*Remember to add your drop shadow as you go along*
Open a new image 650 x 650
Element189, copy & paste to the center of your tag. Duplicate & mirror.
Element189, copy & paste to the center of your tag. Duplicate & mirror.
Element179, copy & paste to the center of your tag.
Element123, copy & paste to the center of your tag.
Element106, copy & paste to the center of your tag then drag down to the bottom of element179.
Activate your magic wand, press and hold your "shift" key - click inside each of your 3 squares on your frame, selections, modify, expand by 21. Open a new raster layer, copy & paste paper14, selections, invert, delete, selections none, drag below your frame.
Pick 2 or 3 nice tubes to use on this tag. Then activate your magic wand, click inside the left square of the frame, selections, modify, expand by 8. Open a new raster layer, copy & paste the first tube, selections, invert, delete, selections none, drag below your frame.
*Repeat this process for the middle and right squares. If you only have 2 tubes then you can duplicate and mirror the left side tube.
Element163 resize 35 percent - mirror, copy & paste to the left side of your frame.
Element160 resize 25 percent, copy & paste to the left side of your frame.
Element160 resize 18 percent - mirror, copy & paste to the left side of your frame.
See my tag for details.
Add more elements if you wish to.
Open new raster layer and send to the bottom, copy & paste paper14 and apply your mask.
Open new raster layer and send to the bottom, copy & paste paper14 and apply your mask.
When you are happy with your tag merge all layers and resize to your liking.
Apply the correct artist copyright and license info and save as a PNG, then add your name and merge & save.
Apply the correct artist copyright and license info and save as a PNG, then add your name and merge & save.
I hope you enjoyed this tut. ♥
~ ~ ~ ~ ~ ~ ~ ~ ~ ~ ~ ~
Thank you so very much for trying my tut Dixie. Your tag is gorgeous!! ♥

A Special Thank You!
I want to say Thank you so very much to a very special friend.
Her name is Sandy and she is one of my friends on ACDiva forum.
She was so sweet to make me my 3 new blog blinkies, the bottom 3 on the left.
She also made the gorgeous blinkies for Elias Artshop, Garv Girls PSP Tubes and VeryMany Tubes. These are all so very beautiful Sandy!! You did such a amazing job on them sweetie. I love them!
Thank you so much for all of your hard work on them!! ♥
Tuesday, October 15, 2013
Witchy Spells - PTU

*Click tag to see full size*
This tutorial is from my own imagination,
any similarity to any other tag or tutorial is purely coincidental.
It was written by LadyAries on October 15th, 2013.
This tut was written for those with a basic knowledge of psp.
*Supplies Needed*
PSP: I am using X2 but any of them should work.
Font of choice, I am using BlackJack
Mask: Becki Mask022 Link unknown at this time.
Mask: Becki Mask022 Link unknown at this time.
Be sure to place your mask into your mask folder.
Drop Shadow usually V3 H3 O25 B5 black
*Tube of Choice*
I am using the beautiful art of Rzhevskii.
This is an Exclusive tube and you will need to join The Exclusive Club to get it.
And it can be purchased HERE.
This is an Exclusive tube and you will need to join The Exclusive Club to get it.
And it can be purchased HERE.
This is a PTU tube and you must have a license to use.
*Scrap kit Of Choice*
I am using the fantastic PTU kit "SpookFest" by DevilishDezines.
And it can be purchased HERE.
~ ~ ~ ~ ~ ~ ~ ~ ~ ~
*PlugIns*
Eye Candy 6, Gradient glow for the name with #5a5d1a~ ~ ~ ~ ~ ~ ~ ~ ~ ~
*Let's Get Started*
*Remember to add your drop shadow as you go along*
Open a new image 650 x 650
Frame2 resize 75 percent, copy & paste to the center of your tag.
Resize paper6 70 percent. Activate your magic wand and click inside the frame, selections, modify, expand by 8. Open a new raster layer, copy & paste paper6, selections, invert, delete, selections none, drag below your frame.
Resize your tube 70 percent, Copy & paste into the center of the frame.
Duplicate your frame and in the layers pallet bring one up above your tube. Use your eraser tool to remove just a little bit of the top frame so that her hat shows nicely.
Element30 resize 50 percent, copy & paste to the left side of your frame.
Element15 resize 40 percent, copy & paste to the bottom of your frame.
Element11 resize 40 percent, copy & paste to the left side of your frame.
Element27 resize 34 percent, copy & paste to the bottom of your frame.
Element19 resize 45 percent, copy & paste to the right side of your frame.
Element21 resize 20 percent, copy & paste to the right side of your frame.
Element5 resize 30 percent, copy & paste to the right side of your frame.
Element19 resize 45 percent, copy & paste to the right side of your frame.
Element21 resize 20 percent, copy & paste to the right side of your frame.
Element5 resize 30 percent, copy & paste to the right side of your frame.
Element50 resize 45 percent, copy & paste to the left side & in the layers pallet drag down to under your frame layers.
Element4 mirror - resize 25 percent, copy & paste to the right side of your frame.
Element4 mirror - resize 20 percent, copy & paste to the right side of your frame.
Layers, duplicate & mirror.
Element24 resize 25 percent, copy & paste to the right side of your frame.
See my tag for details.
Element4 mirror - resize 25 percent, copy & paste to the right side of your frame.
Element4 mirror - resize 20 percent, copy & paste to the right side of your frame.
Layers, duplicate & mirror.
Element24 resize 25 percent, copy & paste to the right side of your frame.
See my tag for details.
Add more elements if you wish to.
Open new raster layer and send to the bottom, copy & paste
paper6 and apply your mask. Duplicate & mirror.
When you are happy with your tag merge all layers and resize to your liking.
When you are happy with your tag merge all layers and resize to your liking.
Apply the correct artist copyright and license info and save as a PNG, then add your name and merge & save.
I hope you enjoyed this tut. ♥
Sunday, October 13, 2013
Fright Night - PTU

*Click tag to see full size*
This tutorial is from my own imagination,
any similarity to any other tag or tutorial is purely coincidental.
It was written by LadyAries on October 13th, 2013.
This tut was written for those with a basic knowledge of psp.
*Supplies Needed*
PSP: I am using X2 but any of them should work.
Font of choice, I am using Ziggy Zoe
Drop Shadow usually V3 H3 O25 B5 black
*Tube of Choice*
I am using the adorable art of TooshToosh.
This is a free tube and you can get it HERE.
And you must have a license to use.
And you must have a license to use.
*Scrap kit Of Choice*
I am using the beautiful PTU kit "Fright Night" by Vickie's Scraps.
~ ~ ~ ~ ~ ~ ~ ~ ~ ~
*Let's Get Started*
*Remember to add your drop shadow as you go along*
Open a new image 650 x 650
Element51 resize 90 percent, copy & paste to the center of your tag.
Element45 flip, copy & paste to the center-top of your tag.
Element45 flip, copy & paste to the center-top of your tag.
Element72 resize 95 percent, copy & paste to the left side of your tag.
Resize your tube 65 percent , copy & paste to the top right side of your tag.
Resize your tube 65 percent , copy & paste to the top right side of your tag.
Element57 resize 85 percent, copy & paste to the center of your tag.
Use your pick tool and drag the top of the fence down some so that it isn't so tall.
Element72 mirror- resize 40 percent, copy & paste to the left side of your tag.
Element146 resize 45 percent, copy & paste to the left side of your tag.
Element98 resize 32 percent, copy & paste to the left side of your tag.
Element132 resize 15 percent, copy & paste to the left side of your tag. Adjust-Sharpness & sharpen.
Element132 resize 15 percent, copy & paste to the left side of your tag. Adjust-Sharpness & sharpen.
Element91 resize 10 percent, copy & paste to the left side of your tag.
Element95 resize 40 percent, copy & paste to the left side of your tag.
Element90 resize 10 percent, copy & paste to the right side of your tag.
Element12 resize 28 percent, copy & paste to the top right side of your tag.
Element122 resize 20 percent, copy & paste to the top right side of your tag.
Element131 resize 25 percent, copy & paste to the right side of your tag. Adjust-Sharpness & sharpen.
Element98 resize 20 percent, copy & paste to the center side of your tag.
Drag it to the bottom of the porch, just touching the ground. Free rotate right 9 degrees.
Element48 resize 25 percent, copy & paste to the top right side of your tag.
Element48 resize 25 percent, copy & paste to the top right side of your tag.
See my tag for details.
Add more elements if you wish to.
Open new raster layer and send to the bottom, copy & paste
paper4.
When you are happy with your tag merge all layers and resize to your liking.
Selections, select all, Modify, Select Selections Borders, Inside, Border width is set on 6 and Anti-alias is checked. Floodfill with #313737 and then click on Adjust, Add/Remove Noise - Add Noise click Random and 60 percent. Selections, Select None. Click on layers and Merge, Merge Visible.
Apply the correct artist copyright and license info and save as a PNG, then add your name and merge & save.
Apply the correct artist copyright and license info and save as a PNG, then add your name and merge & save.
I hope you enjoyed this tut. ♥
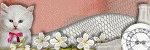
Thursday, October 10, 2013
Haunted Brew - FTU

*Click tag to see full size*
This tutorial is from my own imagination,
any similarity to any other tag or tutorial is purely coincidental.
It was written by LadyAries on October 9th, 2013.
This tut was written for those with a basic knowledge of psp.
*Supplies Needed*
PSP: I am using X2 but any of them should work.
Font of choice, I am using The Blue Oasis
Mask: Becki Mask022 Link unknown at this time.
Be sure to place your mask into your mask folder.
Drop Shadow usually V3 H3 O25 B5 black
*Tube of Choice*
I am using the beautiful art of Elias Chatzoudis
And it can be purchased HERE.
This is a PTU tube and you must have a license to use.
*Scrap kit Of Choice*
I am using the beautiful PTU kit "Troubling Bubbling Brew" by HorsePlay's Pasture.
Mura's Meister Copies
~ ~ ~ ~ ~ ~ ~ ~ ~ ~
*Let's Get Started*
*Remember to add your drop shadow as you go along*
Open a new image 650 x 650
Element68 resize 90 percent, copy & paste to the left side of your blank image. Duplicate, mirror.
Element31 resize 85 percent, copy & paste to behind element68.
Element34 copy & paste to the center of your tag.
Element79 resize 30 percent, copy & paste to the right side of your tag behind the tree.
Element17 resize 50 percent, copy & paste to the right side of your tag.
Element59 resize 80 percent, copy & paste to the center of your tag.
Element51 resize 45 percent, copy & paste to the left side of your tag.
.
Element47 resize 40 percent, copy & paste to the left side of your tag. Duplicate, mirror then duplicate the left one again and move the the center. Make sure all 3 are touching.
Element51 resize 45 percent, copy & paste to the right side of your tag.
Element53 resize 20 percent, copy & paste to the left side of your tag and apply Mura's Meister copies with these setting.

Element37 resize 60 percent, copy & paste to the right side of your tag.
See my tag for details.
Add more elements if you wish to.
Open new raster layer and send to the bottom, copy & paste
paper1 and apply your mask. Duplicate & flip then merge these 2 layers, in your layers palette change the Opacity to 46
When you are happy with your tag merge all layers and resize to your liking.
Apply the correct artist copyright and license info and save as a PNG, then add your name and merge & save.
.
.
I hope you enjoyed this tut. ♥
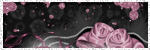
Tuesday, October 8, 2013
A Kiss From A Rose - PTU

*Click tag to see full size*
This tutorial is from my own imagination,
any similarity to any other tag or tutorial is purely coincidental.
It was written by LadyAries on October 8th, 2013.
This tut was written for those with a basic knowledge of psp.
*Supplies Needed*
*Supplies Needed*
PSP: I am using X2 but any of them should work.
Font of choice, I am using One Starry Night
Mask: Gemsmask18 HERE.
Be sure to place your mask into your mask folder.
Drop Shadow usually V3 H3 O25 B5 black
*Tube of Choice*
*Tube of Choice*
I am using the beautiful art of Zlata_M.
This tube was purchased at SATC and is unavailable at the moment.
This is a PTU tube and you must have a license to use.
*Scrap kit Of Choice*
This tube was purchased at SATC and is unavailable at the moment.
This is a PTU tube and you must have a license to use.
*Scrap kit Of Choice*
I am using the beautiful PTU kit "Ami" by Sassi Designs.
*Let's Get Started*
*Remember to add your drop shadow as you go along*
Open a new image 650 x 650
We are using the folder of Brown elements for this tag.
Element10 resize 75 percent, copy & paste to your blank image placing it nicely in the center.
Activate your magic wand and click inside the frame, selections,
modify, expand by 8. Open a new raster layer, copy & paste paper9,
selections, invert, delete, selections none, drag below your frame,Activate your magic wand and click inside the frame, selections, modify, expand by 8. Open a new raster layer, copy & paste your tube. When you have it positioned where you want it click selections, invert, delete, selections none, drag below your frame..
Element12 resize 35 percent, copy & paste to the left side of your frame.
Element7 resize 28 percent, copy & paste to the left side of your frame.
Element18 resize 25 percent, copy & paste to the left side of your frame.
Element19 resize 35 percent, copy & paste to the left side of your frame.
Element14 resize 40 percent, copy & paste to the right side of your frame.
Element5 resize 30 percent, copy & paste to the right side of your frame.
Duplicate, mirror, bring back to the right side and place next to the other flower.
Element20 resize 25 percent, copy & paste to the right side of your frame.
Element5 resize 30 percent, copy & paste to the right side of your frame.
Duplicate, mirror, bring back to the right side and place next to the other flower.
Element20 resize 25 percent, copy & paste to the right side of your frame.
See my tag for details.
Add more elements if you wish to.
Open new raster layer and send to the bottom, copy & paste
paper9 and apply your mask. Duplicate & mirror then merge down,
duplicate & flip.
When you are happy with your tag merge all layers and resize to your liking.
When you are happy with your tag merge all layers and resize to your liking.
Apply the correct artist copyright and license info and save as a PNG, then add your name and merge & save.
I hope you enjoyed this tut. ♥
Sunday, October 6, 2013
Haunting Ashley - PTU

*Click tag to see full size*
This tutorial is from my own imagination,
any similarity to any other tag or tutorial is purely coincidental.
It was written by LadyAries on October 6th, 2013.
This tut was written for those with a basic knowledge of psp.
*Supplies Needed*
PSP: I am using X2 but any of them should work.
Font of choice, I am using A Charming Font
Mask: WSL 84 HERE.
Be sure to place your mask into your mask folder.
Drop Shadow usually V3 H3 O25 B5 black
*Tube of Choice*
This is a PTU tube and you must have a license to use.
*Scrap kit Of Choice*
I am using the fantastic PTU kit "Boo Night" by Vickie's Scraps.
*PlugIns*
Eye Candy 6, Gradient glow for the name with #c66d20
~ ~ ~ ~ ~ ~ ~ ~ ~ ~
~ ~ ~ ~ ~ ~ ~ ~ ~ ~
*Let's Get Started*
*Remember to add your drop shadow as you go along*
Open a new image 650 x 650Activate your magic wand and click inside the frame, selections, modify, expand by 8. Open a new raster layer, copy & paste paper 34, selections, invert, delete, selections none.
Flood fill with #c66d20 and drag below your frame.
Element143 resize 40 percent, copy & paste to the right side of your frame.
Element148 resize 25 percent, copy & paste to the left side of your frame.
Element20 resize 50 percent, copy & paste to the right side of your frame.
Element92 resize 50 percent, copy & paste to the top right side of your frame.
Element178 resize 25 percent, copy & paste to the inside left corner of your frame.
Free rotate left 12 degrees then more to your liking.
Resize tube to your liking and place inside your frame.
Use your Eraser tool to remove any part that may be showing.
Copy and paste element159 placing under your tube.
See my tag for details.
Add more elements if you wish to.
Open new raster layer and send to the bottom, copy & paste paper29 and apply your mask. Duplicate & mirror then merge down, duplicate & flip.
When you are happy with your tag merge all layers and resize to your liking.
Apply the correct artist copyright and license info and save as a PNG, then add your name and merge & save.
I hope you enjoyed this tut. ♥
~ ~ ~ ~ ~ ~ ~ ~ ~ ~ ~ ~
Thank you so very much for trying my tut Dixie. Your tag is gorgeous!! ♥

I hope you enjoyed this tut. ♥
~ ~ ~ ~ ~ ~ ~ ~ ~ ~ ~ ~
Thank you so very much for trying my tut Dixie. Your tag is gorgeous!! ♥

Wednesday, October 2, 2013
CT Tag Show Off
Here are my CT tags that I made for Sassi with this fantastic kit
"PreciousFriends".
This kit is huge!! There is so much that can be done with it. See a listing of her stores HERE. And I used artwork of Alex Prihodko & VeryMany. You can purchase their art from Pics For Design. You must have a license to use this art.
*click on image to view full size*


Tuesday, October 1, 2013
Exciting News
I just had to come and share my awesome news with everyone.
I have been excepted into the CT team of Vickie's Scraps!!!
I am so excited to be working with Vickie and the rest of her team.
Thanks so much Vickie for giving me this chance!
I am so excited to be working with Vickie and the rest of her team.
Thanks so much Vickie for giving me this chance!
Queen Santa Muerte - PTU

*Click tag to see full size*
This tutorial is from my own imagination,
any similarity to any other tag or tutorial is purely coincidental.
This tutorial was written by LadyAries on October 1st, 2013.
This tut was written for those with a basic knowledge of psp.
*Supplies Needed*
PSP: I am using X2 but any of them should work.
Font of choice, I am using 1 BeanSprout
Mask: Gemsmask-217 HERE
Be sure to place your mask into your mask folder.
Drop Shadow usually V3 H3 O25 B5 black
*Tube of Choice*
I am using the fantastic art of Mitzi Sato-Wiuff.
And it can be purchased HERE
This is a PTU tube and you must have a license to use.
*Scrap kit Of Choice*
I am using the beautiful PTU kit "SantaMuerte" by DevilishDezines.
And it can be purchased and HERE
*PlugIns*
Eye Candy 6, Gradient glow for the name.
~ ~ ~ ~ ~ ~ ~ ~ ~ ~
~ ~ ~ ~ ~ ~ ~ ~ ~ ~
*Let's Get Started*
*Remember to add your drop shadow as you go along*
Open a new image 650 x 650
Element55 resize 65 percent, copy & paste to your blank image.
Element72 resize 50 percent, copy & paste to bottom left then duplicate & mirror.
Element85 resize 50 percent, copy & paste near the bottom in the middle of your tag.
Element85 resize 50 percent, copy & paste near the bottom in the middle of your tag.
Element9 resize 50 percent, copy & paste on the left side.
Open your Tube and resize 78 percent, copy & paste to below raster3.
Element76 resize 30 percent, copy & paste on bottom left side.
Element38 resize 20 percent, copy & paste on bottom right side.
Element38 resize 15 percent, copy & paste to bottom left side below element76.
Element44 re size 20 percent, copy & paste to bottom left side below element76.
Element10 resize 15 percent & mirror, copy & paste to bottom right side.
Element78 resize 15 percent, copy & paste to bottom left side on top of your skulls.
Element78 resize 12 percent, copy & paste towards to bottom of your castle, then duplicate & mirror and drag to the bottom right corner.
Element4 resize 75 percent & mirror, copy & paste under raster 2.
See my tag for details.
Add more elements if you wish to.
Open paper7 resize 65 percent, copy & paste and send to the bottom of your layers pallet and apply your mask.
When you are happy with your tag merge all layers and resize to your liking.
Apply the correct artist copyright and license info and save as a PNG, then add your name and merge & save.
I hope you enjoyed this tut. ♥
Subscribe to:
Posts
(Atom)
Copyright Compliant Award

♥Blogs I Love


♥Stores I Love